# S2S with customers 3DS (For PSPs)
# How it works
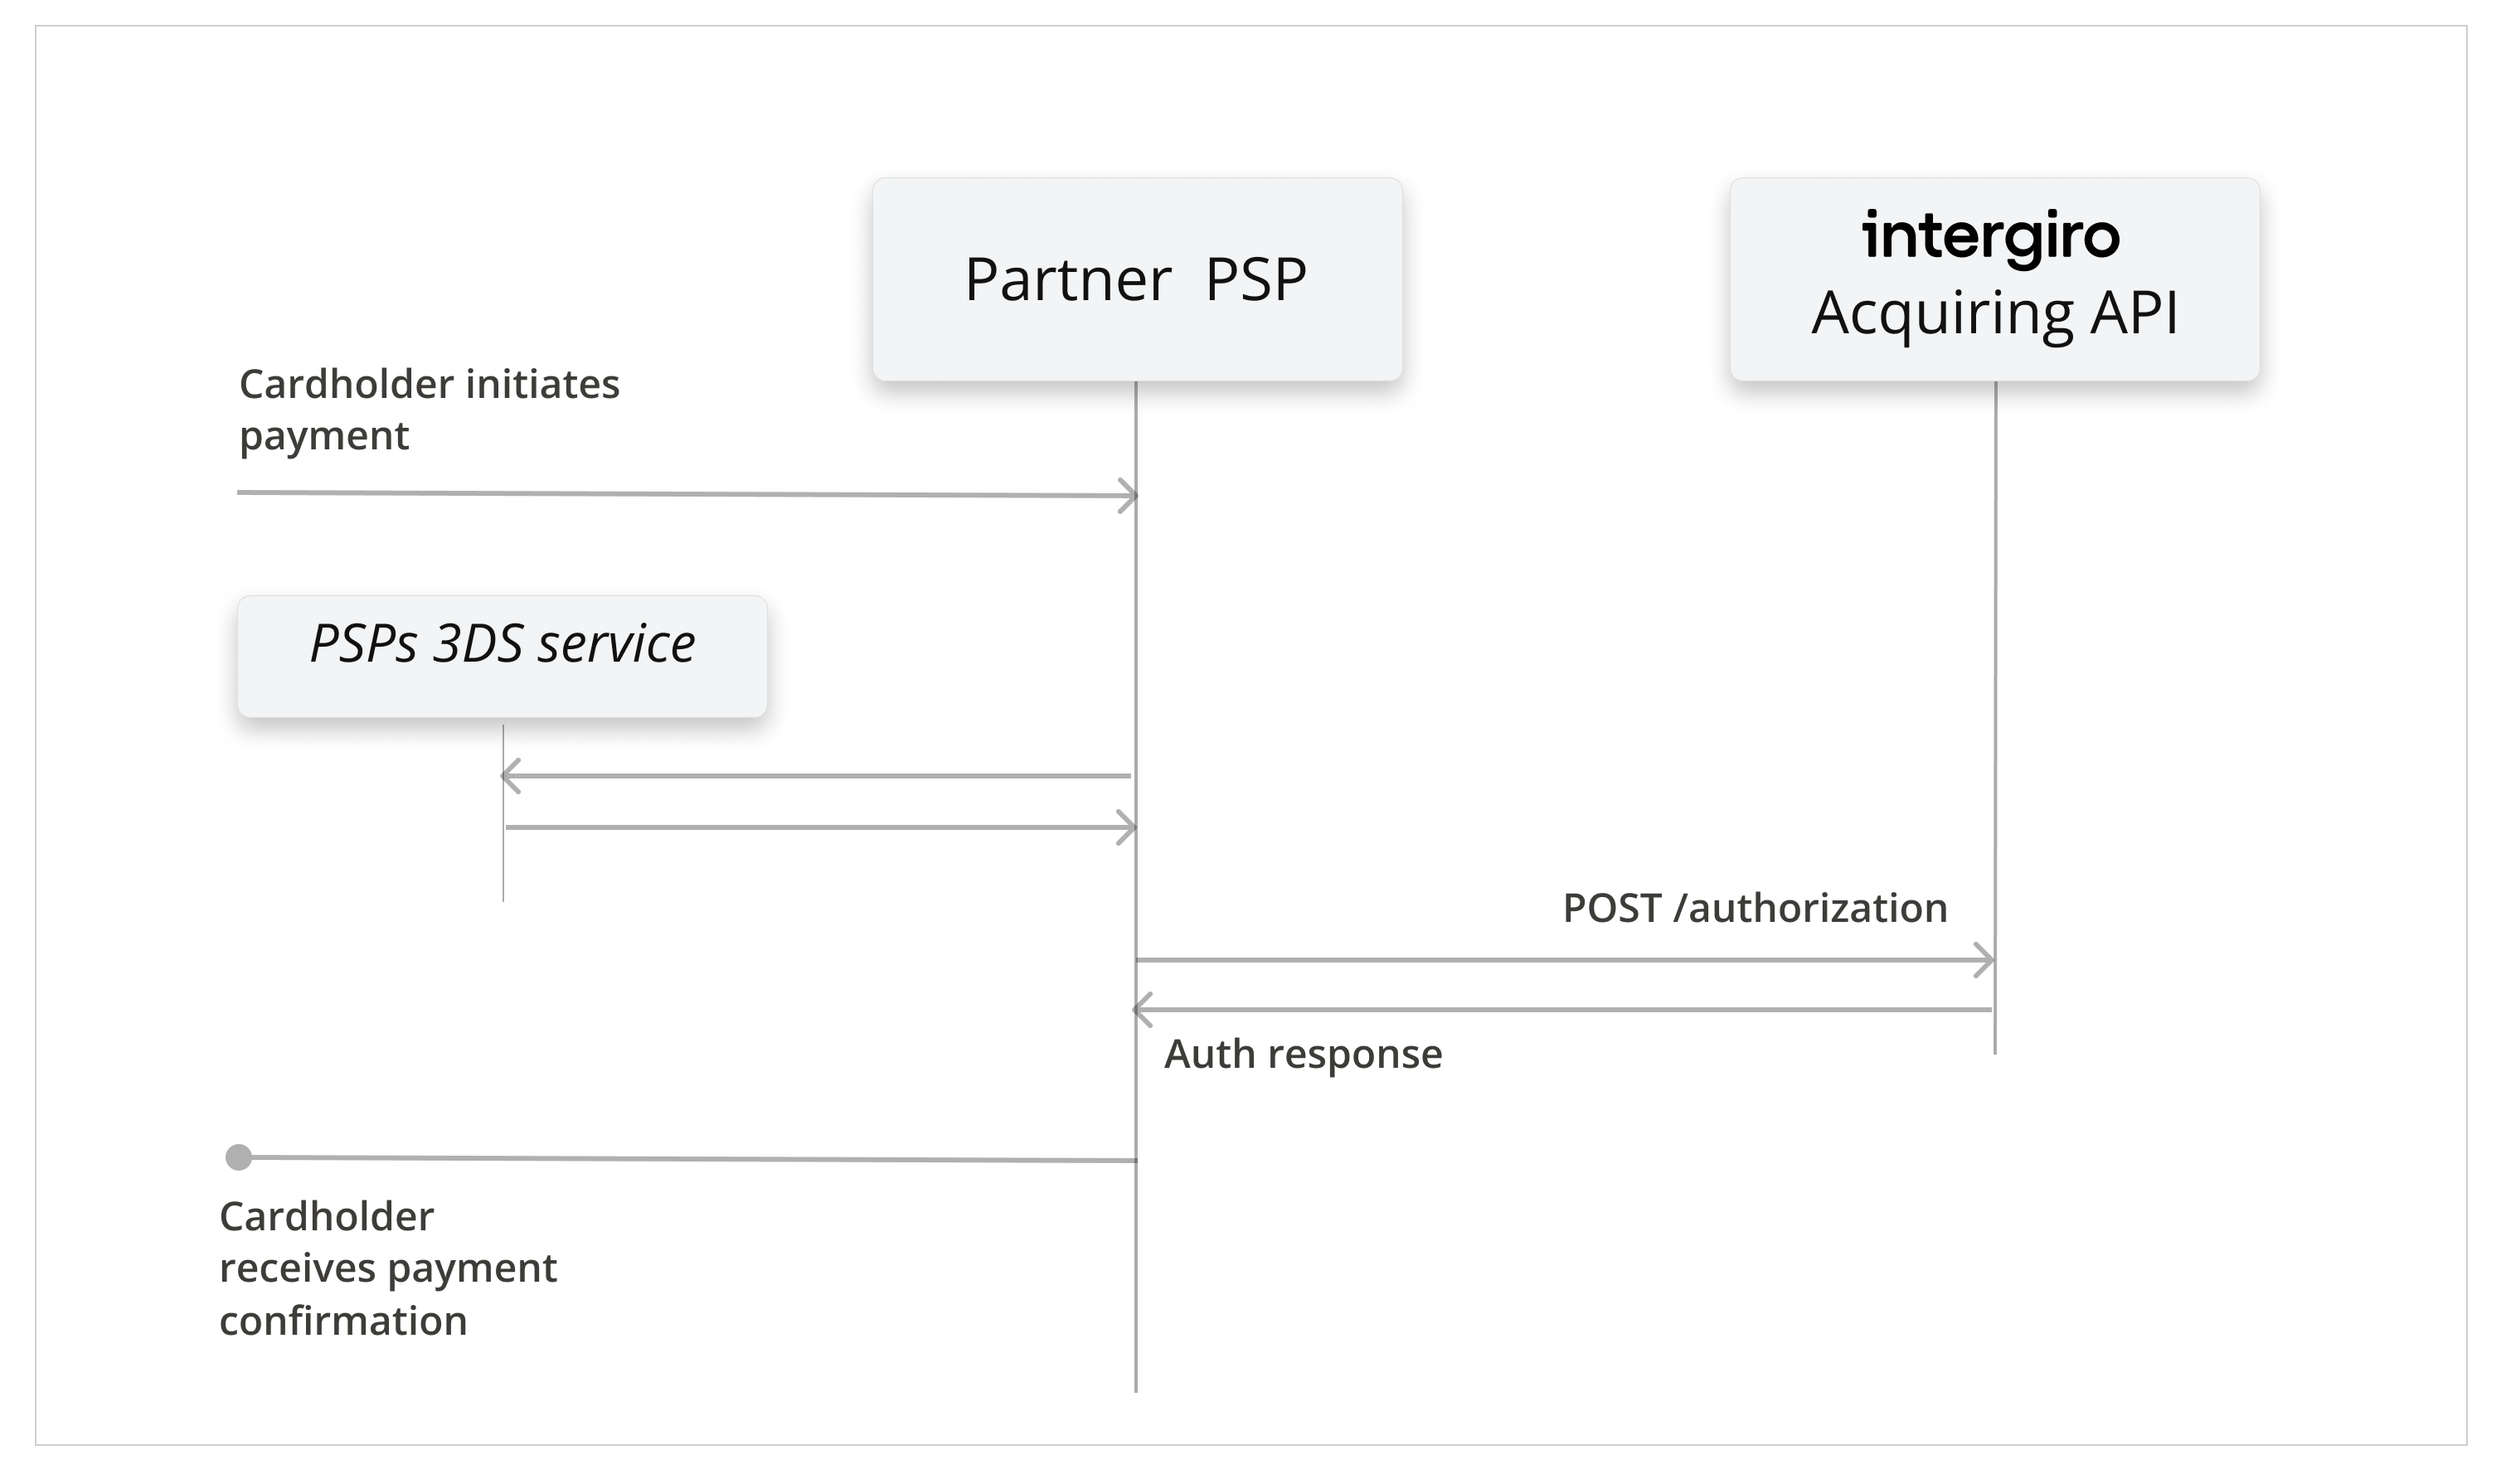
This integration is suitable if you are entirely managing the 3DS service on your end.
# Integration steps
# Perform 3DS authentication
If your use-case requires it, make sure to perform any necessary 3DS steps on your end before reaching our API. E.g. when the customer is present and making a payment, 3DS is almost always required.
# Create an authorization
Prepare an authorization creatable object.
{
  "number": "<merchant_tx_id>",
  "amount": 7.52,
  "currency": "EUR",
  "card":  {
    "pan": "4111111111111111",
    "expires": [2, 22],
    "csc": "987",
    "verification": {
      // <3DS Data>
    }
  },
  "browser": {
      "ip": "213.138.91.2", // REQUIRED with Server-Server flow
      "ipCountry": "SE" // REQUIRED with Server-Server flow
  },
  "contact": {
      "email": "cardholder.email@example.com"
  }
}
# Add 3DS data to the authorization
If customer has gone through the 3DS flow, the authorization is required to contain a Verification object with the resulting 3DS data.
All data in the example is required.
  "verification": {
    "data": {
      "authenticationValue": "<string>",
      "dsTransID": "<string>",
      "messageVersion": "2.1.0" | "2.2.0",
      "messageType": "RReq" | "ARes",
      "eci": "<string>",
      "threeDSServerTransID": "<string>",
      "transStatus": "Y" | "N" | "U" | "A" | "C" | "R"
    }
  }
# Send the request
  POST <base_url>/v1/authorization

  Content-Type: application/json

  AuthorizationObject
# Receive a response
The authorization response will be either:
- A "Verification required" error response with status 400, indicating that 3DS data was not provided
- A successful authorization response with status 201, indicating authorization was approved by the issuer
- A failed authorization with reasons of failure.
# Example
A full example can be accessed from the github repository or downloaded as a html file. To test the code, a public api key without 3D configurations is required to be added to the const key in the code.